Thursday, May 21, 2009

Dance Design


It is that time of year when the slower pace of winter melts away and life becomes very busy! End of school year events like concerts, dances, art shows, recitals, drama performances and parades absorb my attention and time. As busy as it gets I do love this time of year!
Recently, I have been working on a new design that I will use to make pins and necklace charms. I will be selling the pins and necklaces to raise some money to go towards recital costs for my daughter's dance school. It is one of the favorite things I do during the year.
Here is hoping you also get to enjoy a performance or art show of your favorite dancer, musician or young artist!

Sunday, May 10, 2009

Dreaming Of My New Garden


Every year in the spring I start to spend a lot of time outside in the garden. First I clean it up, pull off the leaves and then discover what of my perennials are going to make it back for another season. Next I plant the seeds, taking a casual approach with a loose plan. This year I am hoping to find the time to expand my garden and create a back yard full of lilies, sunflowers, morning glories, marigolds, columbine, nastrium and maybe even some veggies!
I took these photos at the recent Portland Flower Show, it was a beautiful show. Hopefully these photos will inspire my imagination so I can create a new and colorful oasis for me, my family and friends! I also think in these photos and later the growing garden there will be inspiration for a painting or two! Happy Spring!

Monday, May 4, 2009

Next Steps for Design 2


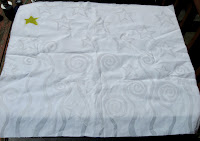
I am starting to work on the fabric with design number two. I have painted the stars with a yellow dye. The next step will be to paint the stars with wax to protect the yellow. Then dye the fabric in a blue dye bath later this week.

Tuesday, April 28, 2009

Painting with Dye

Back to work now that spring vacation is done! Spring has arrived so I can work outside!
Here are the photos of the next steps of the batik process. I am painting on the dye today. Here is the waxed fabric before I start to paint.


I have started to paint with yellow paint that I will mix with some blue to create green.


Adding some green paint now to fill in the leaves.


Now I am painting the back ground with the bright blue paint.


Here is a close up of the finished piece of fabric. After drying for 24 hours I will rinse it out with hot water to remove the soy wax and excess dye.


The finished fabric. More steps to come soon!

Monday, April 20, 2009

Painted with Wax


Here are some more photos of the waxed fabric featuring design number two.

Friday, April 17, 2009

Next Steps

As promised, here are the next steps in creating a batik.

Here is my work station: tools, melted wax and cotton fabric.


Getting ready to paint with the melted wax.


Here I am painting the fabric with a sumi brush and the melted wax.


More progress.


This piece of cotton is ready for dye!


Check back soon to see my progress.

Monday, April 13, 2009

What is Batik?


It's hard to believe, but I first tried out the batik process as a teenager, which was a long time ago! I was inspired by a magazine article... and my desire to create something cool for my dorm room. I figured it would be fun! What I created was a big mess and a love for the process that continues today.

When I do shows, there is a real mix of customers who know the process, those who want to hear more and others who, like me, are inspired to learn how to batik themselves. I am currently working on a new design today, so this seems like the perfect opportunity to answer the questions so often asked: What is batik? How does it work? How do you get the beautiful colors and what creates that crackling effect? Is it hard? You get the idea.

So over the next week or two, I will try to answer some of these questions and illustrate the process of batik.

Here is my description....Batik, an Indonesian word meaning, “wax writing,” is a process in which an artist “writes” or paints on fabric or paper. The wax creates a resist that protects the fabric from the dye when the fabric is either immersed in or painted with the dyes. A new waxing and dying process must be repeated for each color and layer of the design. Wikipedia describes it as "a wax- resist dyeing technique used on textile." The key components being wax and dye.

For me the process starts with the design, which is created with paper and pencil or pen. Here is step one: The design. Check back later this week to see step two.

Happy Monday!